 |
| Add caption |
The purpose of this post, is to show you how to show or
hide some fields, based on what choice you have made in a drop-down field, something like what it appears in the following GIF :
Many SharePoint developers are already familiar with
InfoPath. It was a simple and powerful form tool back in the day – but it is
now out of date. So, SharePoint Online and Hybrid Solutions can use PowerApps
to customise forms and even create very advanced business applications!
Getting started with SharePoint Form customization using PowerApps
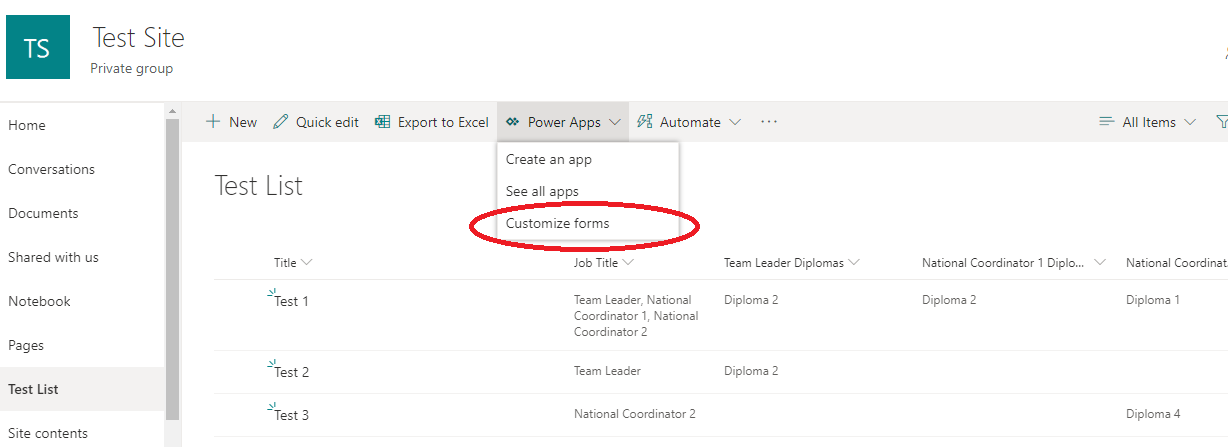
To launch PowerApps, we go to our SharePoint Online list, there you will find in the menu on every list page
3 Options will appear, the one which interest us is Customize forms , which is a way to customize SP list forms (new form, edit form) in a similar way to InfoPath, It's tied to a specific SP list.
The thing we are going to do, is to make the visibility propriety of each field change to true if we choose what is linked to, else it change to false, and so on with the other fields.
Go and select the field you want to Show or Hide, either select him directly from the view pane, or go the Tree view and select the card of the required field as shown bellow:
In the drop-down list shown on top of the screen, select the Visibility property from there and you will find par default the value is true.
Now to understand what we're going to do, since the "Job Title" field is a choice field, and it can multiple selection, so the value returned if we do an action to that field will be a table, which will contain the choices made (for example if we choose Team Leader and National Coordinator 1, the table will be : ["Team Leader","National Coordinator 1"],
Now in the visibility property, we need to set a condition and test if the required choice is selected or not, if it is selected then the field should appear (value become true), else the field should stay hidden (value become false)
The condition will be as shown :
If(CountRows(Filter('Job Title Value'.SelectedItems,Value = "Team Leader")) > 0,true,false)The trick here, is I am counting the number of records in that table that contain the value "Team Leader", if it's greater than 0 then the choice is selected (true), else it is not (false)
The same thing for the other fields :
If(CountRows(Filter('Job Title Value'.SelectedItems,Value = "National Coordinator 1")) > 0,true,false)
If(CountRows(Filter('Job Title Value'.SelectedItems,Value = "National Coordinator 2")) > 0,true,false)
And the final form will look like in the end as shown above in that GIF, As you can see with PowerApps you can create a simple form like this in a matter of minutes, all from an easy to use interface !
I hope you like it,
Enjoy !


0 Comments